A1 Garage Door Logo 1

Garage Door Installation Greensburg PA: Timeline From Removal To Setup

    A successful garage door project starts long before panels go up—it begins with load calculations, opening measurements, and matching hardware to daily usage. Many issues show up later because the prep phase gets rushed. A standard system operates under repeated stress, often exceeding 4–6 cycles per day, which adds up quickly over time.

    When planning Garage Door Installation Greensburg PA, the key is understanding how each component interacts. Door weight, spring rating, and opener capacity must work in sync. If one element is off, the entire system compensates, leading to noise, uneven travel, or early wear.

    Homeowners often ask how long installation takes and what affects timelines. The short answer—most projects run smoothly when the structure is square, the framing is intact, and the right materials are pre-selected. Skipping these checks slows everything down.

    2026 Pre-Installation Inspection And Measurement Process

    Before any panel is lifted or track is mounted, the groundwork happens at inspection. This phase is where installers size up the opening, assess load requirements, and flag structural inconsistencies that could throw the whole project off track. Skip this step or rush it, and you’re asking for misalignment, noisy operation, or early wear.

    In 2026, inspection isn’t just a tape measure job anymore. It’s a detailed system evaluation. Technicians assess headroom clearance (typically 12–15 inches for standard systems), backroom depth, and side room spacing to ensure compatibility with track systems and opener types. Even a half-inch deviation can affect balance and force distribution.

    Greensburg homes often present framing shifts due to seasonal expansion and contraction. That’s why measurement accuracy down to fractions of an inch is non-negotiable. The goal is to match door weight, spring cycle rating, and opener horsepower to real-world usage—not just manufacturer defaults.

    Critical Data Points Measured Before Installation

    • Opening width and height tolerance (±1/8 inch accuracy)
    • Headroom and backroom clearance for track configuration
    • Door weight estimation based on material (steel, composite, insulated)
    • Spring cycle requirements (standard 10,000 vs high-cycle 20,000+)
    • Electrical readiness for opener systems
    • Structural integrity of jambs and header

    These aren’t just numbers—they dictate how the entire garage door system behaves under daily load.

    Performance Impact Of Proper Pre-Installation Planning

    When measurements are dialed in, everything downstream runs smoother. Balanced torsion springs reduce opener strain. Correct track alignment minimizes roller friction. Proper clearance prevents panel binding during operation.
    In high-use households, where doors cycle 6–10 times per day, improper sizing can shave years off system lifespan. A mismatch between door weight and spring tension leads to overcompensation by the opener motor—one of the most common causes of early failure.

    Measurement And Inspection Benchmarks (2026 Data)


    Inspection Parameter


    Standard Range / Spec


    Impact On Installation Outcome


    Opening Tolerance


    ±1/8 inch


    Prevents track misalignment and panel gaps


    Headroom Clearance


    12–15 inches


    Determines track type and spring configuration


    Spring Cycle Rating


    10,000–25,000 cycles


    Directly affects lifespan and maintenance


    Door Weight (Single Door)


    130–250 lbs


    Influences spring tension and opener size


    Opener Horsepower Requirement


    1/2 HP – 1 HP


    Ensures smooth lifting without overload


    Roller Diameter


    2–3 inches


    Affects noise level and track wear


    Why 2026 Installations Are More Data-Driven

    Installations today lean heavily on performance data rather than guesswork. Smart openers, insulated doors, and heavier composite materials demand precise calibration. It’s not about “making it fit”—it’s about engineering a system that runs efficiently from day one.
    Ignoring these details is like building on shaky ground. Get the inspection right, and the rest of the installation falls into place without friction.

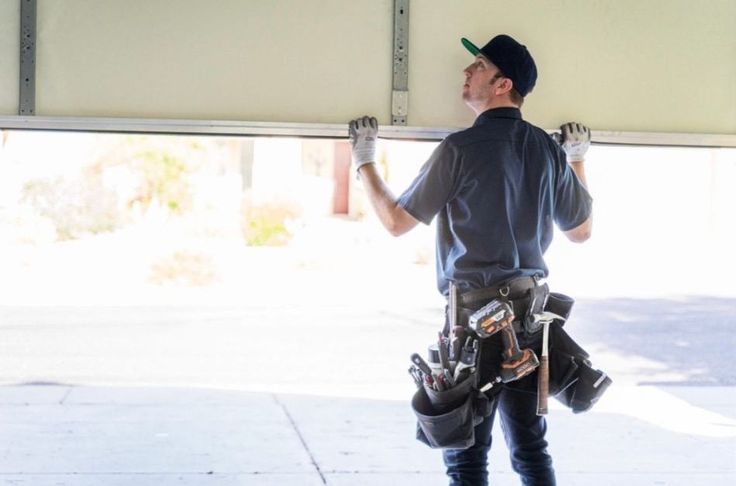
    Removing The Existing Door And Preparing The Opening

    The Transition Phase That Can Make Or Break Installation

    Once inspection is complete, the next step is removing the existing system. This isn’t just a teardown—it’s a controlled process that prevents structural damage and ensures the opening is ready for a new installation.

    Garage doors can weigh over 200 pounds, and their tension systems store significant mechanical energy. Improper removal of torsion springs or cables can cause sudden release, leading to damage or unsafe conditions. That’s why this phase requires methodical sequencing.

    Breaking Down The Removal Process

    The removal phase typically follows a structured approach:
    1. Spring tension release – safely unwinding torsion springs
    2. Disconnection of opener system – isolating power and drive mechanisms
    3. Panel-by-panel dismantling – starting from the top section
    4. Track and hardware removal – clearing side and overhead tracks
    5. Cable and drum detachment – releasing lift system components
    Each step is designed to gradually reduce the load and avoid stress on the framing.

    Opening Preparation: The Hidden Work Behind Smooth Installation

    After removal, attention shifts to the opening itself. This is where installers correct any irregularities that could interfere with the new system. Over time, garage openings can warp, shift, or develop uneven surfaces.

    Preparation includes reinforcing jambs, leveling the floor threshold, and ensuring the header can support the new load distribution. Even minor inconsistencies—like a slightly sloped floor—can lead to sealing gaps and uneven wear.

    Structural And Alignment Adjustments

    • Re-squaring the opening to ensure parallel alignment
    • Reinforcing mounting points for track brackets
    • Checking moisture damage or wood rot in framing
    • Adjusting floor level for proper bottom seal contact
    • Ensuring anchor points can handle dynamic load

    These adjustments aren’t visible once the door is installed, but they directly impact performance and durability.

    Subheading: Why Proper Removal Prevents Future Repairs

    Cutting corners during removal often leads to hidden problems. Bent tracks, damaged framing, or leftover hardware can interfere with new components. It’s like trying to install precision equipment on an uneven base—it won’t perform as intended.

    In Greensburg, where humidity and seasonal changes can affect materials, preparation becomes even more critical. A clean, level, and reinforced opening sets the stage for a smooth installation process.

    Subheading: Efficiency Gains In 2026 Installation Methods

    Modern tools and techniques have streamlined removal and prep phases. Technicians now use calibrated winding bars, laser levels, and digital measurement tools to speed up the process without sacrificing accuracy.

    Garage Door Installation Greensburg PA Scheduling And Setup Phases

    Once assembly components are in place, the project shifts into scheduling and coordinated setup. This is where timing, crew sequencing, and site readiness all come together. A well-planned schedule keeps the installation moving without bottlenecks, while poor coordination can drag things out and introduce unnecessary adjustments.

    Garage Door Installation Greenburg scheduling typically depends on door type, hardware complexity, and site conditions. Standard single-door setups can be completed within a few hours, but insulated systems, custom sizing, or structural corrections may extend timelines. What matters most is not speed alone—it’s maintaining accuracy at every step.

    Technicians usually block installation into phases: setup, mounting, calibration, and system check. Each phase builds on the previous one, so timing has to be tight. If one step falls behind, it creates a domino effect across the entire workflow.

    Key Scheduling Factors That Influence Setup Time

    1. Door type and material weight (steel vs insulated composite)
    2. Availability of correctly sized components and hardware
    3. Electrical readiness for opener installation
    4. Structural condition of opening and mounting surfaces
    5. Crew experience and workflow coordination
    6. Weather conditions affecting installation pace

    These variables don’t just impact timing—they influence how efficiently the system is installed and how soon it’s ready for daily use.

    Installation Timeline And Performance Benchmarks


    Installation Phase


    Average Time Range


    Key Outcome


    Site Preparation


    30–60 minutes


    Opening cleared, tools staged


    Track And Panel Setup


    1.5–2.5 hours


    Structural assembly completed


    Spring And Cable Installation


    45–90 minutes


    Load distribution system installed


    Opener Mounting


    45–75 minutes


    Motor and drive system secured


    System Calibration


    30–60 minutes


    Balance and safety adjustments finalized


    Final Inspection


    15–30 minutes


    Operational verification completed


    This structured flow ensures that each component is installed under controlled conditions, reducing the risk of rework or post-installation issues.

    Set-up Efficiency Depends On Sequencing

    Installation isn’t random—it follows a strict order. Tracks must be aligned before panels are stacked. Springs must be installed after structural components are secured. Opener systems are added only after balance is achieved. This sequencing prevents load misdistribution and mechanical strain.

    If steps are rushed or performed out of order, it leads to friction points—literally and mechanically. Misaligned tracks or improperly tensioned springs often show up later as noise, vibration, or uneven movement.

    Environmental Factors That Affect Scheduling

    In Greensburg, temperature swings and humidity can influence installation pace. Cold conditions can stiffen materials, while moisture may affect anchoring points or electrical connections. Experienced crews adjust their workflow to account for these variables, ensuring consistent results regardless of conditions.

    Workflow Coordination Improves Long-Term Results

    When scheduling is dialed in, everything clicks into place. The installation moves smoothly, components align correctly, and the system is ready for calibration without delays. It’s about working smarter, not just faster—keeping the process tight and controlled from start to finish.

    Opener Integration, Balance Testing, And Safety Calibration

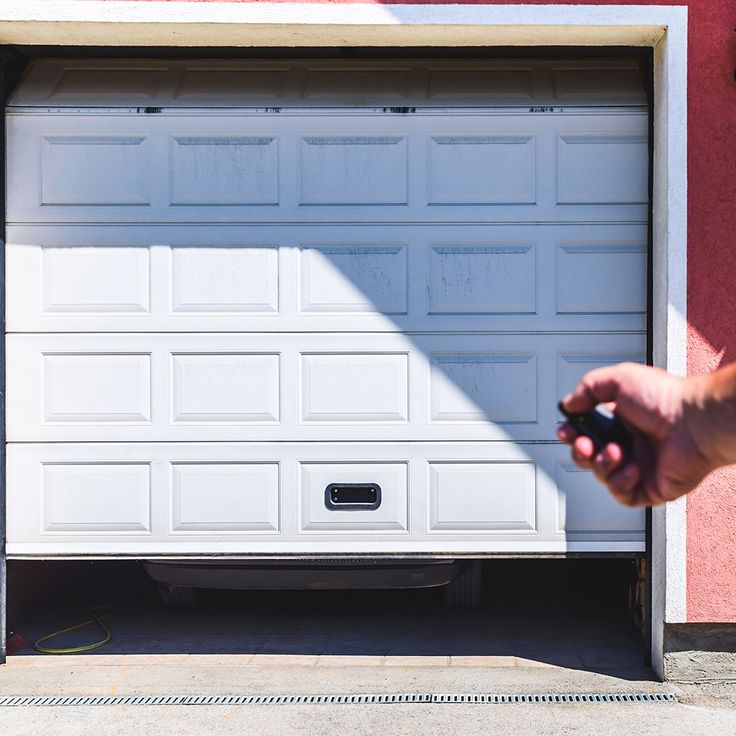
    Bringing The System To Life

    With the physical structure assembled, the next step is integrating the opener and dialing in system performance. This is where the garage door transitions from a static installation to a fully functional system. Precision here makes the difference between smooth daily operation and long-term mechanical strain.

    Opener integration starts with mounting the motor unit and aligning it with the door’s centerline. The drive system—belt, chain, or screw—must be tensioned correctly to avoid slippage or excessive resistance. Even small misalignments can cause vibration, noise, or uneven lifting.

    Balance Testing Is The Core Of System Efficiency

    Before activating the opener, technicians perform manual balance testing. This step checks whether the torsion springs are correctly calibrated to offset the door’s weight.

    A properly balanced door:
    • Stays in place when lifted halfway
    • Moves smoothly without resistance
    • Requires minimal force to operate manually
    If the door drifts up or drops down, spring tension needs adjustment. Skipping this step forces the opener to compensate, which can lead to premature motor wear.

    Calibration Metrics That Define Performance

    • Lift force alignment with door weight
    • Spring torque calibrated to within safe tolerance
    • Opener travel limits set to prevent overextension
    • Closing force adjusted to avoid excessive pressure
    • Safety reversal sensitivity tested under load

    These settings ensure the system operates within safe mechanical limits.

    Safety Systems And Sensor Alignment

    Modern garage door systems include safety sensors that detect obstructions and reverse operation. Proper alignment of these sensors is critical. Even slight misplacement can cause false triggers or failure to respond when needed.

    Sensors are typically positioned 4–6 inches above the floor and must face each other directly. Wiring connections are secured and tested to ensure uninterrupted communication with the opener system.

    Why Calibration Reduces Long-Term Wear

    When calibration is precise, the system runs efficiently. The opener doesn’t overwork, springs maintain proper tension, and components move without unnecessary resistance. This reduces wear on rollers, tracks, and hinges over time.

    In high-cycle environments, where doors operate multiple times daily, proper calibration can extend system lifespan by several years. It also keeps operation quiet and consistent—something homeowners notice right away.

    Fine-Tuning The System For Daily Use

    After initial setup, technicians run multiple open-close cycles to verify performance. Adjustments are made in real time to eliminate friction points and ensure smooth transitions between movement phases. The goal is simple: a system that opens and closes without hesitation, noise, or imbalance. When everything is tuned correctly, the door operates effortlessly, and the entire setup feels solid from day one.

    Timeframes, Delays, And Factors That Affect Completion Speed

    Understanding What Speeds Up Or Slows Down Installation

    Even with a well-structured plan, installation timelines can shift depending on site conditions and system complexity. Knowing what impacts completion speed helps set realistic expectations and avoids unnecessary frustration.

    Most installations follow a predictable timeline, but variables like structural repairs, custom sizing, or hardware availability can introduce delays. The key is identifying these factors early and adjusting the workflow accordingly.

    Core Factors That Influence Installation Duration

    • Structural condition of the garage opening
    • Complexity of door design and insulation level
    • Availability of high-cycle springs and hardware
    • Electrical readiness for opener integration
    • Weather conditions impacting work pace
    • Precision required for custom-fit installations

    These factors don’t just affect speed—they influence how smoothly the installation progresses from one phase to the next.

    Typical Completion Time Ranges

    For standard installations, total project time often falls within a same-day window. However, more complex setups may extend into additional hours due to calibration, adjustments, or structural corrections.

    Efficiency comes from preparation. When measurements are accurate and components are ready, installation moves quickly without compromising quality.

    Hidden Delays That Often Go Unnoticed

    Some delays aren’t obvious at first glance. Slight framing misalignment, uneven flooring, or outdated electrical setups can require additional adjustments mid-installation. These issues don’t always show up during initial inspection but can affect later stages.

    Addressing these factors on the fly requires experience and adaptability. Crews that know how to pivot without disrupting workflow keep projects on track.

    Why Rushing The Process Backfires

    Cutting corners to save time often leads to bigger problems down the line. Misaligned tracks, improperly tensioned springs, or rushed calibration can result in noisy operation, uneven wear, and frequent repairs.

    Taking the time to get each phase right ensures the system performs reliably under daily use. It’s a classic case of doing it right the first time instead of fixing issues later.

    Keeping The Project On Track From Start To Finish

    A well-managed installation balances speed with precision. Clear scheduling, proper preparation, and skilled execution keep the project moving without unnecessary delays.

    When everything lines up—materials, measurements, and workflow—the installation wraps up efficiently, and the system is ready for long-term use without hiccups.

    How To Choose The Right Team For A Smooth Installation Process

    Choosing the right crew comes down to technical precision, not just availability. Proper installation depends on accurate measurements, balanced spring tension, and clean track alignment—all of which require real field experience. Teams that understand load distribution and opener calibration deliver systems that run smoothly without added strain.

    Look for installers who focus on full-system setup, not quick fixes. They should handle structural adjustments, use high-cycle components, and verify balance before finalizing the job. Consistency in installation leads to quieter operation, fewer service calls, and longer system life.
    Cutting corners early usually shows up later as wear, noise, or misalignment. Getting it right the first time pays off. Contact A1 Garage Door Repair Service if you need a properly planned and executed installation.
    Frequently Ask Questions

    Service Information & Answers

    Most standard installations are completed within 4–6 hours, assuming the opening is properly prepared and no structural adjustments are needed. Projects involving insulation upgrades, custom sizing, or opener integration can extend the timeline. A well-planned garage door installation Greensburg PA project moves faster when measurements, materials, and hardware are aligned before work begins.

    The biggest cost drivers include door material, insulation level (R-value), size, and hardware quality. High-cycle springs, reinforced panels, and smart opener systems can increase upfront pricing but reduce long-term maintenance. Labor complexity also plays a role, especially if structural corrections are required during installation.

    Replacement is often the better option when the system shows repeated failures, structural wear, or outdated components. New systems provide improved insulation, smoother operation, and better safety features. If the door has exceeded its cycle life or requires frequent repairs, replacement offers better long-term value.

    Look for technicians who focus on full-system installation, not just panel replacement. Experienced crews evaluate load balance, spring calibration, and opener compatibility before starting. A professional garage door installation company will also provide clear measurements, proper alignment, and final system testing.

    Yes, double doors carry more weight and require stronger torsion systems, reinforced tracks, and higher-capacity openers. Proper balance and alignment are even more critical due to the increased load. Installation precision ensures the door operates evenly without putting excess strain on components.

    A complete installation includes removal of the old door, preparation of the opening, track and panel assembly, spring installation, opener setup, and safety calibration. Final testing ensures smooth operation and proper balance before the system is fully operational.