A1 Garage Door Logo 1

How Garage Door Spring Repair Works Step by Step

    “Can I just watch a YouTube video and replace my garage door spring myself?” Every seasoned technician secretly loves this question — because the person asking it is already thinking more carefully than the person who just grabs a wrench. If you’re researching Garage door springs repair New Castle PA and want to understand how garage door spring repair works step by step before someone shows up at your house, you’re in exactly the right place. Let’s break down what the job actually involves, why it carries real risk, and what a professional does from the moment they pull into your driveway to the moment they hand you the opener.

    Why "Can I Just Watch a Video and Do It Myself?" Is Actually a Smart Question

    Most people who ask this aren’t being cheap — they’re being curious, and curiosity is healthy here. Garage door springs store an enormous amount of mechanical energy. A fully wound torsion spring on a standard two-car door can hold 30 to 50 foot-pounds of torque. When one snaps (and you’ve probably heard the bang), it releases all of that instantly.


    The reason we don’t recommend DIY spring replacement isn’t to protect our business — it’s because the tools required (winding bars, proper clamps, a torque-calibrated approach) are things most homeowners don’t own and have never practiced with. One slip of a winding bar at the wrong moment can cause a serious hand or face injury. That’s not a scare tactic; we’ve seen the aftermath.


    So yes, it’s a smart question. The smarter follow-up is: “What exactly is a technician doing during this repair, so I can make sure the job is done right?”

    Torsion vs. Extension Springs: What Type Do You Have?

    Before we walk through the process, you need to know which spring system your door uses — because the repair procedure is different for each.

    Torsion Springs

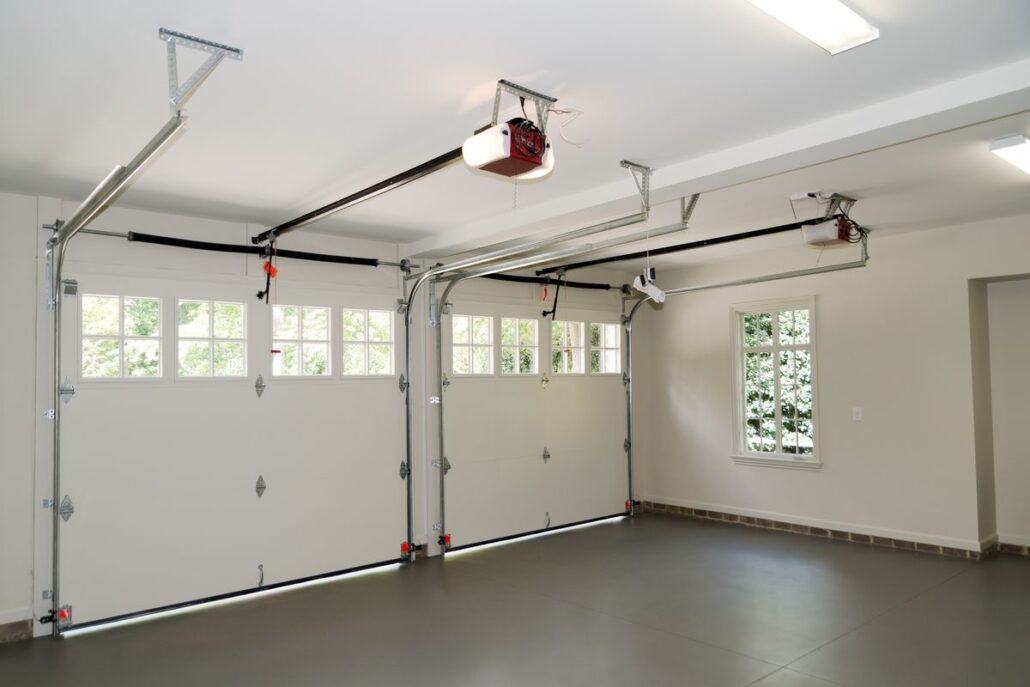
    These run horizontally along a metal shaft mounted above the door opening. Most modern residential doors in the New Castle area use torsion springs. They’re wound and unwound with winding bars, and they lift the door by rotating the shaft, which winds the cables around the drums.

    Extension Springs

    These run along the horizontal tracks on either side of the door and stretch (extend) as the door closes. Older homes often have extension spring systems. They’re generally considered slightly more forgiving to work around, but they still carry significant stored energy and require proper safety cables to prevent a broken spring from becoming a projectile.
    If you’re not sure which you have, look above the door when it’s closed. One horizontal bar = torsion. Two springs running along the sides = extension.

    Is Your Garage Door Giving You Trouble?

    Dealing with a broken garage door? Our experienced technicians provide quick, dependable repairs for broken springs, damaged openers, off-track doors, and more. We deliver quality workmanship and prompt service to get your garage door working safely again.

    How Garage Door Spring Repair Works Step by Step

    Here’s what actually happens during a professional spring repair. This is the process our technicians follow on every single job.

    Step 1: Safety Check and Assessment

    Before touching anything, we look at the whole system — not just the broken spring. We check the cables for fraying, the drums for wear, the bearings on the torsion shaft, and the condition of the second spring (if one broke, the other is usually near end of life too). Skipping this step is how homeowners end up calling us back in three months for a cable repair.

    Step 2: Securing the Door

    The door gets clamped or locked in the down position. This is non-negotiable. A door that shifts while a spring is being unwound can cause the whole system to move unexpectedly.

    Step 3: Releasing Tension from the Old Spring

    For torsion springs, we insert winding bars into the holes of the winding cone and carefully unwind the spring — typically around 30 quarter-turns for a standard door, counting each one. This step is where most DIY injuries happen. The bars must be held firmly and the process done steadily, with no shortcuts.

    For extension springs, we open the door to the fully open position first (which releases tension naturally), then disconnect and remove the spring.

    Step 4: Removing the Broken Spring

    Once tension is fully released, we slide the old spring off the shaft (torsion) or unhook and remove it from the track brackets (extension). We inspect the shaft, drums, and hardware for damage before anything new goes on.

    Step 5: Installing the New Spring

    The replacement spring has to be the right size — not just length, but wire diameter and inside diameter. These specs determine the lift force. Using a spring that’s even slightly off-spec means the door won’t balance correctly, and an unbalanced door puts extra strain on the opener motor. We measure and confirm before installing.

    For torsion systems, the new spring slides onto the shaft and is secured at the stationary cone end. Then we wind it the correct number of turns (usually determined by door height and weight — a 7-foot door typically needs about 30 quarter-turns, while an 8-foot door gets closer to 34).

    Step 6: Tensioning and Balancing

    After winding, we tighten the set screws on the winding cone, then manually disconnect the opener and lift the door by hand to about waist height. A properly balanced door should stay put — it shouldn’t drift up or fall down. If it drifts, we adjust the tension until it holds. This balance test is the real quality check.

    Step 7: Lubrication and Final Inspection
    We apply lubricant to the spring coils, bearings, and cables. Then we reconnect the opener, run the door through several complete cycles, and check the opener’s force settings. If you want to maintain this yourself between service visits, our guide on how to lubricate your garage door walks through exactly what to use and where.

    What Our Technician Is Evaluating While They Work

    A spring replacement isn’t just a parts swap. While we’re on the job, we’re simultaneously assessing:


    • Cable condition: Frayed or kinked cables often fail right after a spring replacement because the new spring puts full load on a weakened cable. We flag this every time. If you want to understand what garage door cable repair involves, the process has its own steps but is often done at the same visit.
    • Bottom bracket integrity: These take a beating over years of use and are a common failure point.
    • Opener force settings: An opener that was straining against a broken spring may now be set too high, which wears out the new spring faster.
    • Track alignment: A door that was running crooked before the spring broke often contributed to the spring failure.


    None of this adds cost unless something actually needs fixing — but you deserve to know what we’re looking at.

    How Long the Repair Takes — and What Can Slow It Down

    A straightforward single torsion spring replacement on a standard residential door takes most experienced technicians 45 to 75 minutes. Add another 20 to 30 minutes if both springs need replacing (which we usually recommend anyway, since they age together).


    What slows things down:
    • Corroded or seized hardware that requires extra effort to remove
    • Non-standard spring sizes that aren’t on the truck and need to be ordered
    • Discovering secondary damage (cables, drums, brackets) during the inspection
    • Very high-cycle or commercial-grade systems that require specific tooling


    We carry a wide range of spring sizes on our service vehicles specifically to avoid the “we’ll have to order the part” situation on standard residential doors.

    How to Keep Your Springs Lasting Longer After the Fix

    Standard residential torsion springs are rated at 10,000 cycles. One cycle = one full open and one full close. If you use your garage door four times a day, that’s roughly 7 years. Here’s how to push toward the top of that range instead of the bottom:


    • Lubricate every six months. Dry coils create friction that accelerates metal fatigue. A silicone-based or lithium grease spray is ideal — avoid WD-40, which displaces moisture but doesn’t actually lubricate long-term.
    • Don’t ignore balance issues. If your door strains going up or drops faster than it should, get it looked at before it kills the spring.
    • Keep the tracks clean. Debris and rust in the tracks put extra load on every moving part, springs included.
    • Consider upgrading to high-cycle springs. For busy households, springs rated at 20,000 or even 30,000 cycles are available — usually for a modest upcharge. Worth asking about when you schedule.


    If you’re also dealing with issues beyond springs — like sensors that won’t align or an opener that’s acting erratically — we handle the full picture. Our same-day garage door service covers the whole system, not just the part that’s visibly broken.
    Frequently Ask Questions

    Frequently Asked Questions About Garage Door Spring Repair

    The clearest sign is a door that won’t open at all, or one that the opener strains to lift just a few inches before stopping. You may also hear a loud bang (the spring snapping) and see a visible gap in the coil when you look at the spring itself. Sometimes only one spring breaks but both should be inspected.

    We strongly advise against it. Running your opener against a broken spring puts extreme stress on the motor, drive system, and cables. Even one or two cycles can cause secondary damage that turns a $150–$250 spring repair into a much larger job.

    Not always required, but almost always the right call. If one spring has reached end of life, the other is typically at the same wear stage. Replacing both at the same visit saves you a second service call in 6–18 months — and you only pay one labor charge.

    For most standard residential torsion or extension spring setups in and around New Castle, yes. We stock common spring sizes on our vehicles. If your door uses an unusual configuration or oversized springs for a heavy custom door, there may be a short lead time.

    It’s very common to find cable wear during a spring replacement — they work together under the same load cycles. Combining both repairs at one visit is more cost-effective than scheduling separately, and it means the whole lifting system is restored at once.

    If your spring has snapped or you want a technician to assess your system before it fails, call A1 Garage Door Repair Service. We serve New Castle, PA and the surrounding area with honest diagnostics and repairs done right the first time. Book your appointment today and we’ll get your door working safely — often the same day you call.